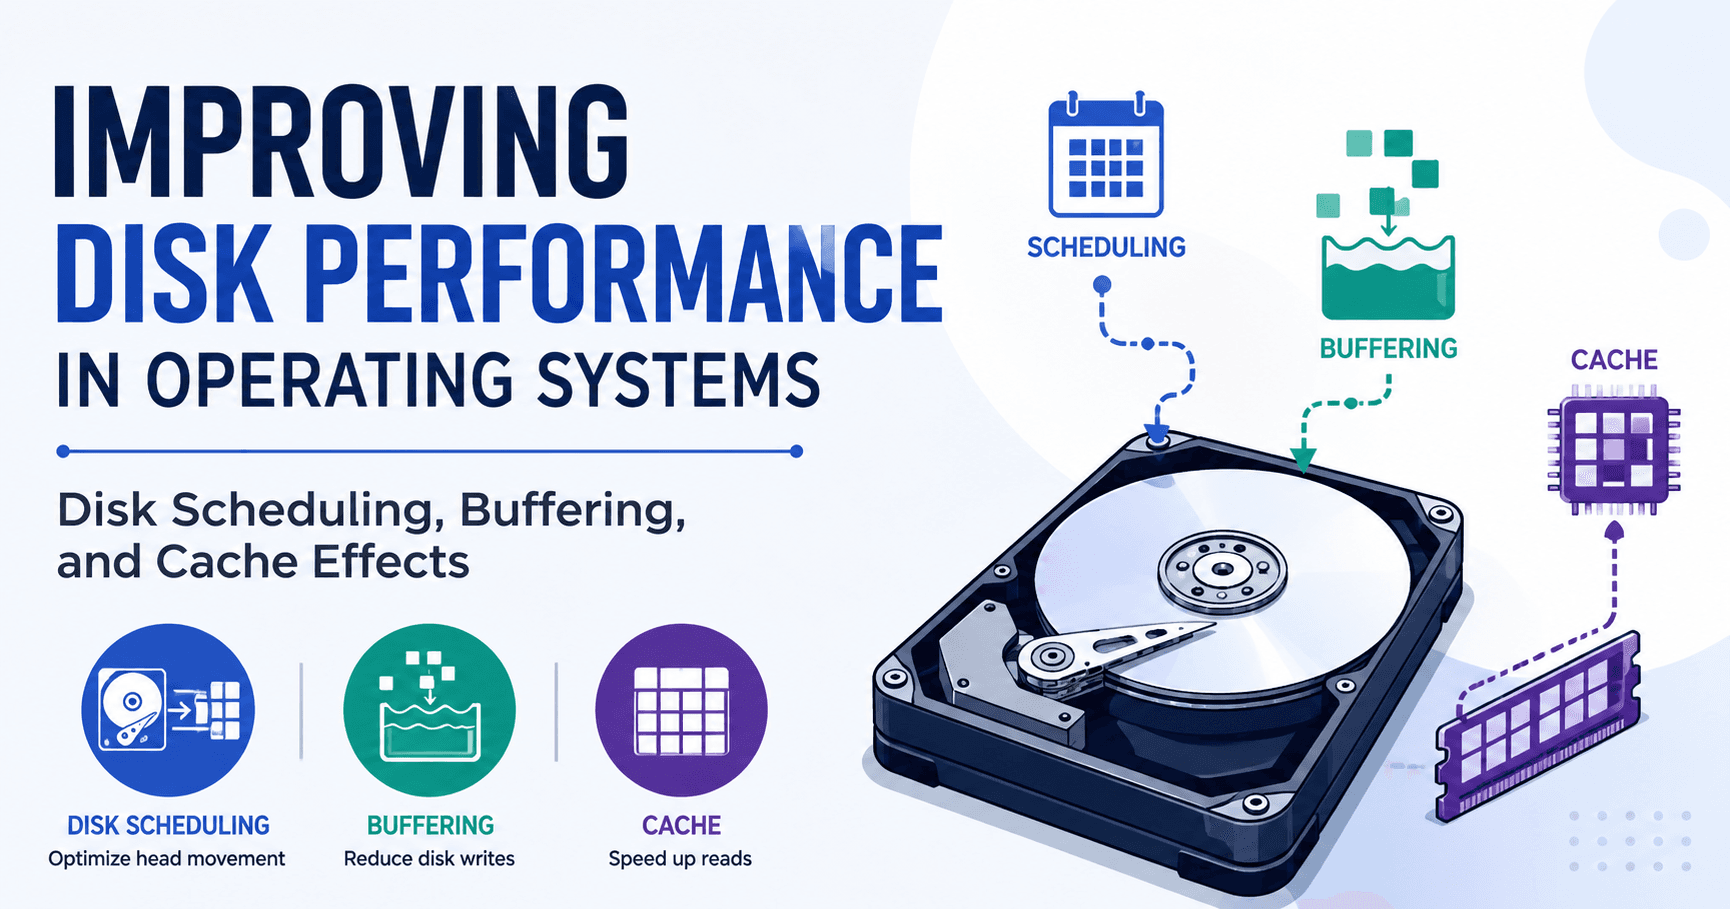
White-Box Testing: Coverage, Control Flow, and Test Design Strategies
1️⃣ White Box Test Preview
2️⃣ Statement asnd Branch Testing
3️⃣ Conditon Testing
1️⃣ White Box Test Preview
What is White-Box Testing? Core Concepts and Goals
White-box testing is a concept that contrasts with black-box testing. While black-box testing verifies software behavior solely based on inputs and outputs without looking at its internal structure, white-box testing does the opposite; it tests software by directly examining its internal code and structure.
So what is the goal of white-box testing? Based on its relationship with black-box testing, the core goal is to verify that the internal code and logical flow of the software operates correctly.
화이트박스가 무엇이고 화이트박스의 주요한 개념에 대해서 살펴본다. 앞서 블랙박스의 상대적인 개념으로 화이트박스 테스트라는 개념을 배웠다. 그 내용을 고려해서 화이트박스 테스트의 목표는 무엇인지 생각해보자.

The Goal of White-Box Testing and the Emergence of Coverage
Whether black-box or white-box, testing every possible case is practically impossible in terms of time and cost. The same applies to white-box testing. So what should be tested given these constraints?
White-box testing is defined as testing the paths within source code. The more if statements, selection statements, and loops exist in the source code, the more diverse the paths become — and more diverse paths mean more cases to test. Since it is realistically impossible to test every path in software, what matters most is how "effectively" testing is performed.
Therefore, the goal of white-box testing is to test as much of the software as possible. To achieve this, "appropriate" testing must be performed, and the key lies in selecting the right paths. If choosing a single path allows a large portion of the source code to be covered simultaneously, that constitutes an excellent test.
This is why a suitable standard for determining which paths cover the most ground is absolutely necessary; even a simple program can have a vast number of paths. This is the point at which the concept of Coverage emerges. Coverage is defined as the suitable standard for determining which specific paths can cover the most ground simultaneously.
화이트박스 테스트의 목표와 커버리지 개념의 등장
블랙박스 테스트든 화이트박스 테스트든, 모든 케이스를 테스트하는 것은 시간과 비용 측면에서 사실상 불가능하다. 화이트박스 테스트 역시 마찬가지다. 그렇다면 시간과 비용의 제약 속에서 무엇을 대상으로 테스트를 수행해야 할까?
화이트박스 테스트의 정의는 소스코드의 경로를 테스트하는 것이다. 소스코드 안에 if문, 선택문, 반복문 등이 많아질수록 경로는 더욱 다양해지고, 경로가 다양해진다는 것은 곧 테스트해야 할 케이스가 많아진다는 뜻이다. 소프트웨어의 모든 경로를 테스트하기란 현실적으로 불가능하기 때문에, 결국 얼마나 '효과적인' 테스트를 수행하느냐가 중요해진다.
따라서 화이트박스 테스트의 목표는 가능한 한 많은 부분을 테스트하는 것이다. 이를 위해서는 '적합한' 테스트가 수행되어야 하며, 그 핵심은 적절한 경로를 선택하는 데 있다. 하나의 경로를 선택했을 때 소스코드의 많은 부분을 함께 커버할 수 있다면, 그것이 바로 좋은 테스트가 된다.
이처럼 어떤 경로를 선택해야 소스코드의 많은 부분을 커버할 수 있는지를 판단하기 위한 적합한 기준이 반드시 필요하다. 간단한 프로그램이라도 경로는 아주 다양할 수 있기 때문이다. 바로 이 지점에서 커버리지(Coverage) 라는 개념이 등장한다. 특정 경로를 통해 많은 부분을 함께 커버할 수 있는 적합한 기준, 그것이 커버리지로 정의된다.

The Concept of Source Code Coverage and Its Levels
The target of white-box testing is source code. Covering as much of the source code as possible is therefore essential, and from this need emerges the concept of source code coverage. Coverage is a metric that represents how much of the source code was executed by the test cases we created. Naturally, a strategy for designing tests that maximizes this coverage is required.
However, achieving 100% coverage across all programs is realistically difficult due to time and cost constraints.
Coverage is divided into levels. From lowest to highest: Function Coverage, Statement Coverage, Branch/Condition Coverage, Modified Condition/Decision Coverage (MC/DC), and Multiple Condition Coverage. Function coverage is the lowest level because if the functions within a program are not properly tested, the program as a whole cannot be considered tested.
A higher coverage level means more test cases are required and more effort is needed to create them. For this reason, it is important in practice to at least satisfy the lower levels of coverage as thoroughly as possible. Ultimately, in white-box testing, the standard and direction of testing varies depending on what is being measured — functions, branches, modified conditions, and so on.
소스코드 커버리지의 개념과 레벨
화이트박스 테스트의 대상은 소스코드다. 그렇기 때문에 소스코드의 많은 부분을 커버하는 것이 핵심이며, 이로부터 소스코드 커버리지라는 개념이 등장한다. 커버리지란 우리가 만든 테스트케이스가 소스코드를 얼마만큼 실행했는지를 나타내는 지표다. 당연히 이 커버리지를 높이는 방향으로 테스트를 설계하는 전략이 필요하다.
다만 모든 프로그램에서 커버리지를 100% 달성하는 것은 현실적으로 어렵다. 시간과 비용의 제약이 존재하기 때문이다.
커버리지는 레벨별로 나뉜다. 가장 낮은 수준부터 순서대로 나열하면 함수 커버리지(Function Coverage), 문장 커버리지(Statement Coverage), 분기/조건 커버리지(Branch/Condition Coverage), 변경조건/결정 커버리지(MC/DC), 다중조건 커버리지(Multiple Condition Coverage) 순으로 높아진다. 함수 커버리지가 가장 낮은 수준인 이유는, 프로그램 내의 함수들이 제대로 테스트되지 않으면 전체 프로그램이 테스트되었다고 볼 수 없기 때문이다.
커버리지 레벨이 높다는 것은 그만큼 테스트케이스도 많아지고, 이를 만드는 데 더 많은 노력이 필요하다는 뜻이다. 그렇기 때문에 현실적으로는 적어도 낮은 수준의 커버리지부터 최대한 만족시키는 것이 중요하다. 결국 화이트박스 테스트에서는 함수, 분기, 변경조건 등 무엇을 대상으로 커버리지를 측정하느냐에 따라 테스트의 기준과 방향이 달라진다.

Function Coverage; The Most Basic Coverage Concept and Test Design Strategy
The most fundamental type of coverage is Function Coverage. A program is largely composed of functions, and function coverage is the metric that represents how thoroughly those functions have been tested. As mentioned earlier, it is the lowest level of coverage, and since it targets functions, it is conducted through unit testing. Function coverage must achieve 100% — every function in a program must naturally be tested, as this is the most basic requirement.
Function Coverage = Number of Functions Tested / Total Number of Functions × 100%
In the example, three functions exist: function_A, function_B, and function_C, where function_C internally calls function_A. Testing only function_A yields 1/3, or 33.333%. Testing function_C covers function_A as well, giving 2/3, or 66.666%. To reach 100%, rather than testing A, B, and C separately, testing function_B and function_C alone covers all three functions; achieving 100% function coverage with just two test cases. This is the essence of test design strategy.
While the difference between 2 and 3 test cases may seem trivial in this simple example, real programs can have tens, hundreds, or even thousands of functions. Analyzing the program thoroughly and understanding the relationships between functions; in order to achieve the highest possible coverage with the minimum number of test cases; is both test suitability and a critical consideration alongside coverage.
커버리지 중에서도 가장 기본적인 것은 함수 커버리지(Function Coverage)다. 프로그램은 많은 부분이 함수로 구성되어 있으며, 함수 커버리지란 이 함수들을 얼마나 테스트했는지를 나타내는 지표다. 앞서 언급했듯 커버리지 레벨 중 가장 낮은 수준에 해당하며, 함수를 대상으로 하기 때문에 단위 테스트(Unit Test)를 통해 진행된다. 함수 커버리지는 반드시 100% 달성되어야 한다. 프로그램에 존재하는 함수는 당연히 모두 테스트되어야 하며, 이것이 테스트의 가장 기본이기 때문이다. 함수 커버리지는 다음과 같이 계산된다.
함수 커버리지 = 테스트한 함수 수 / 전체 함수 수 × 100%
첨부된 예시를 보면, function_A, function_B, function_C 세 개의 함수가 존재하고, function_C는 내부적으로 function_A를 호출하고 있다. function_A만 테스트했을 경우 1/3, 즉 33.333%의 커버리지가 나온다. function_C를 테스트하면 function_A도 함께 호출되므로 2/3, 즉 66.666%가 된다. 그렇다면 100%를 달성하려면 어떻게 해야 할까? function_A, B, C를 각각 따로 테스트하는 것보다, function_C를 테스트하면 function_A까지 함께 커버되므로, function_B와 function_C, 이 두 가지만 테스트해도 전체 함수 3개를 모두 커버하여 100%를 달성할 수 있다. 즉, 테스트케이스 2개만으로 함수 커버리지 100%를 만족하게 되는 것이다. 이것이 바로 테스트 설계 전략이다. 이 예시는 비교적 단순하여 2개와 3개의 차이가 크지 않아 보일 수 있다. 그러나 실제 프로그램은 함수가 수십, 수백, 수천 개에 달한다. 시간과 비용이 충분하다면 모두 개별적으로 테스트할 수 있겠지만, 실제 프로젝트에서는 사실상 불가능하다. 따라서 프로그램을 잘 분석하고 함수 간의 관계를 파악하여, 최소한의 테스트케이스로 최대한 높은 커버리지를 달성하는 노력이 필요하다. 이것이 바로 테스트의 적합성이며, 커버리지 개념과 함께 반드시 고려해야 할 부분이다.

Control Flow Graph (CFG); A Core Tool for White-Box Testing
One of the most important concepts in white-box testing is the Control Flow Graph (CFG). Rather than reading hundreds or thousands of lines of source code directly, representing the code as a diagram in the form of a flowchart makes it far easier to understand. The CFG serves this purpose — it is a graph that logically represents the procedures, processes, and control structures (yes/no, etc.) of a program's execution. In simple terms, it is equivalent to a flowchart.
A CFG is composed of nodes and edges. Nodes represent program execution, branching, and control flow, while edges represent the flow between nodes. For example, a statement like INT X = 1; becomes node 1, an IF (X > 0) branch becomes node 2, and the yes/no branches become nodes 3 and 4 respectively.
Any program, regardless of length, can be expressed as a CFG. While short code is easy to understand directly, longer code becomes increasingly difficult to follow. Representing it as a CFG allows the flow to be grasped at a glance and makes deriving test cases significantly easier; which is precisely why CFGs are widely used in white-box testing.
제어 흐름도(CFG) 화이트박스 테스트의 핵심 표현 도구
화이트박스 테스트에서 중요한 개념 중 하나가 바로 제어 흐름도(Control Flow Graph, CFG)다. 소스코드 수백, 수천 줄을 그대로 읽는 것보다 이를 순서도 형태의 다이어그램으로 표현하면 훨씬 이해하기 쉽다. 제어 흐름도는 바로 이런 목적으로, 프로그램이 실행되는 절차와 과정, 그리고 제어 구조(yes/no 등)를 논리적으로 표현한 그래프다. 쉽게 말해 플로우차트, 즉 순서도와 같은 형태라고 볼 수 있다. 제어 흐름도는 노드(Node)와 간선(Edge)으로 구성된다. 노드는 프로그램의 실행, 분기, 제어 흐름 등을 표현하고, 간선은 노드 간의 흐름을 나타낸다. 첨부된 예시를 보면, INT X = 1;과 같은 코드가 노드 1로, IF (X > 0) 분기문이 노드 2로 표현되며, 조건에 따른 yes/no 분기가 각각 노드 3과 4로 나뉘는 방식이다. 어떤 프로그램이든, 천 줄이든 만 줄이든 상관없이 제어 흐름도로 표현이 가능하다. 코드의 양이 적을 때는 코드 자체를 이해하는 것이 어렵지 않지만, 줄 수가 많아질수록 파악이 점점 어려워진다. 제어 흐름도로 표현하면 흐름을 한눈에 파악할 수 있고, 이를 통해 테스트케이스를 도출하는 데도 훨씬 용이해진다. 이것이 화이트박스 테스트에서 제어 흐름도를 활용하는 이유이다.

Types of Control Flow Graphs; Representing if, while, and switch Statements
A CFG represents the control structures within a program; such as if statements, while loops, and switch statements - as graphs.
The first type is the if statement. Depending on whether condition P (the predicate node) is true or false, the flow diverges to either S1 or S2, before merging again at S3.
The second type is the while loop. When condition P is true, S1 is executed repeatedly; when false, the loop exits and proceeds to S2.
The third type is the switch statement. Depending on condition P, the flow branches into case 1 through case 4 (including default), corresponding to S1 through S4, and all cases eventually merge at S5.
In this way, the control structure of any source code, expressed through nodes and edges, constitutes a Control Flow Graph.
제어 흐름도의 유형; if, while, switch 문의 그래프 표현
제어 흐름도는 프로그램 내의 제어 구조, 즉 if문, while문, switch문 등을 그래프로 표현한 것이다. 첨부된 예시를 통해 대표적인 유형 세 가지를 살펴볼 수 있다.
첫 번째는 if문이다. 조건 P(predicate 노드)가 true인 경우와 false인 경우에 따라 노드의 흐름이 달라지며, S1 혹은 S2로 분기된다. 이후 두 경로는 다시 S3으로 합쳐진다.
두 번째는 while문이다. 조건 P가 true인 경우 S1을 반복 실행하고, false인 경우 반복문을 벗어나 S2로 진행하는 흐름을 그래프로 표현한다.
세 번째는 switch문이다. 조건 P에 따라 case 1부터 case 4(default 포함)까지 각각 S1, S2, S3, S4로 분기되는 흐름을 표현하며, 모든 케이스는 최종적으로 S5로 합쳐진다.
이처럼 어떤 소스코드든 제어 구조를 노드와 간선으로 이루어진 그래프로 표현한 것이 바로 제어 흐름도(Control Flow Graph)이다.

Individual Conditions vs. the Overall Condition Expression
When working with CFGs, it is necessary to distinguish between two concepts: individual conditions and the overall condition expression.
Consider the if statement IF ((X > 2) AND (Y < 4)). This condition expression results in either true or false overall. Within it, 'X is greater than 2' and 'Y is less than 4' are each small, distinct units separated by operators like AND or OR — these are called individual conditions. The combination of all individual conditions that together determine the overall true/false result of the control flow is called the overall condition expression.
This distinction matters because it is directly tied to coverage. There are testing methods that target the overall condition expression, and separate methods that target individual conditions. The type and level of coverage varies depending on which unit serves as the testing standard; which is why clearly understanding the difference between these two terms is important.
제어 흐름도를 이해하다 보면 개별 조건과 전체 조건식이라는 두 가지 개념을 구분할 필요가 있다.
예를 들어 IF ((X > 2) AND (Y < 4))라는 if문이 있다고 하자. 이 조건식은 전체적으로 true 아니면 false, 두 가지로 나뉜다. 이때 'X가 2보다 크다'는 조건과 'Y가 4보다 작다'는 조건처럼, AND나 OR 같은 연산자로 구분되는 각각의 작은 단위 조건을 개별 조건이라고 한다. 그리고 이 개별 조건들이 모여 제어 흐름 전체의 true/false를 결정하는 조합 전체를 전체 조건식이라고 한다.
이 구분이 중요한 이유는 커버리지와 직결되기 때문이다. 커버리지를 측정할 때 전체 조건식을 대상으로 테스트하는 방법이 있고, 개별 조건 단위를 대상으로 테스트하는 방법이 별도로 존재한다. 어떤 단위를 기준으로 테스트하느냐에 따라 커버리지의 종류와 수준이 달라지기 때문에, 이 두 용어의 차이를 명확히 이해해 두는 것이 중요하다.

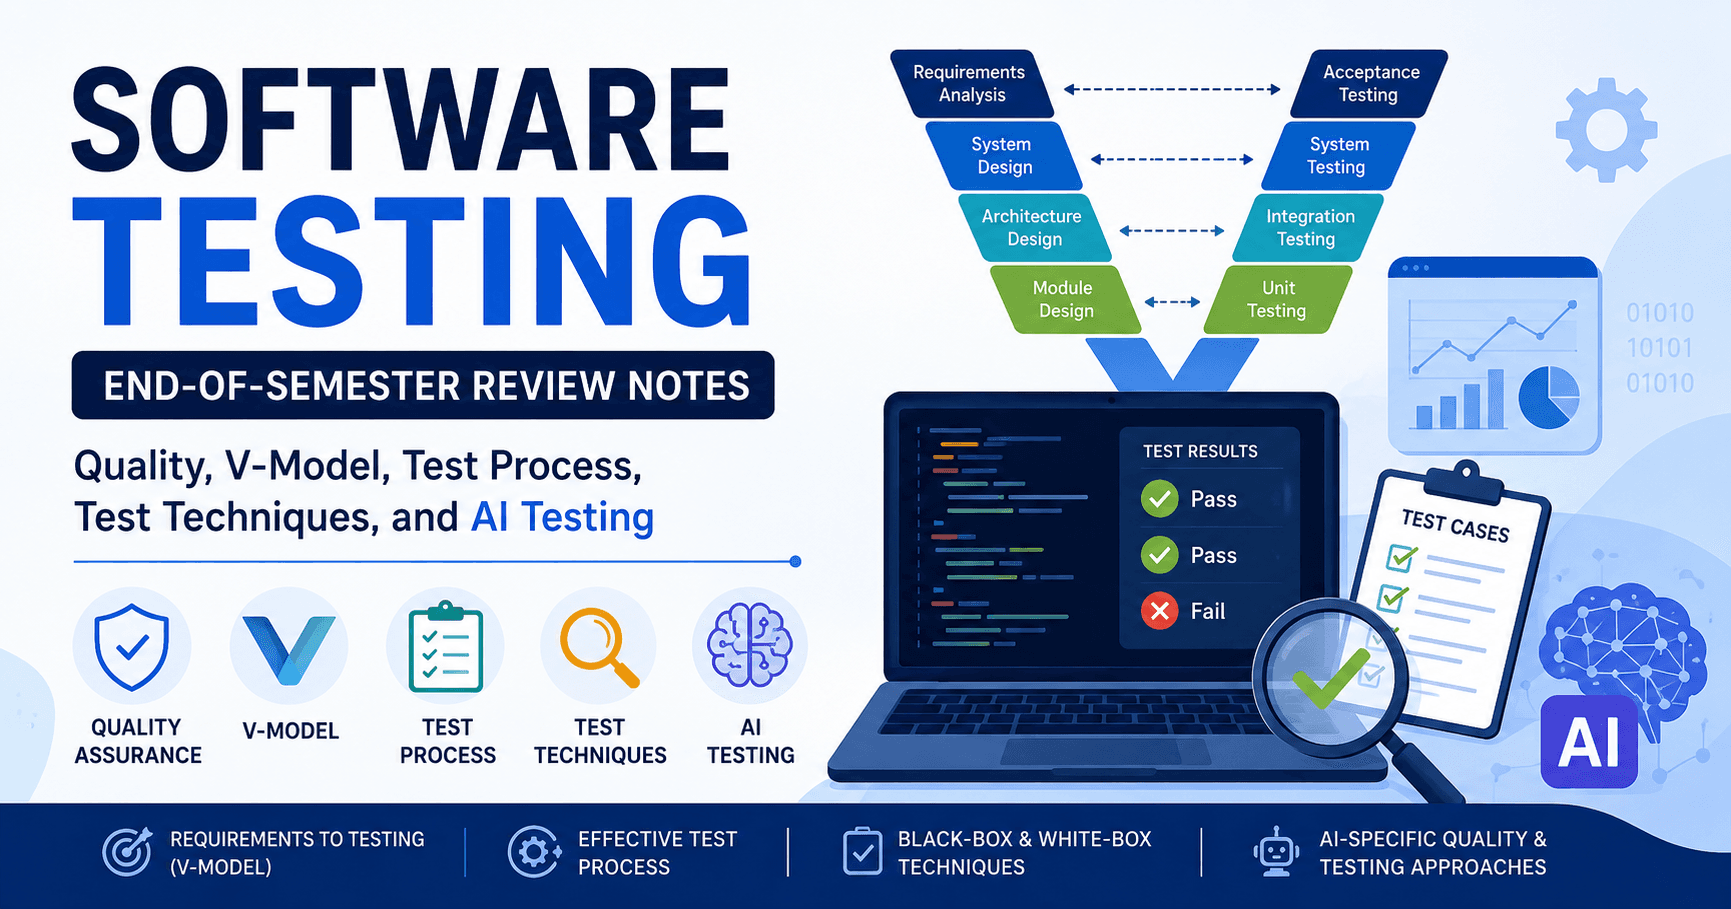
Types of White-Box Test Design Techniques; End of Lecture 1
White-box test design techniques are numerous, with many defined in testing standards. Techniques such as Statement Testing, Branch Testing, and Condition Testing exist among many others. In this session, three key techniques were covered, with more advanced techniques to be explored in the next class.
Today's lecture covered the definition and goals of white-box testing, as well as the Control Flow Graph; a tool for applying white-box testing effectively.
화이트박스 테스트 설계 기법의 종류; 1차시 마무리
화이트박스 테스트 설계 기법은 테스트 표준에 정의된 것만 해도 아주 다양하다. 문장 테스팅(Statement Testing), 분기 테스팅(Branch Testing), 조건 테스팅(Condition Testing) 등 여러 종류가 존재하는데, 오늘은 이 중 세 가지를 중심으로 살펴볼 예정이며, 고급 기법에 대해서는 다음 시간에 다루게 된다.
오늘 강의에서는 화이트박스 테스트의 정의와 목표, 그리고 이를 효율적으로 활용하기 위한 도구인 제어 흐름도까지의 내용을 살펴보았다.
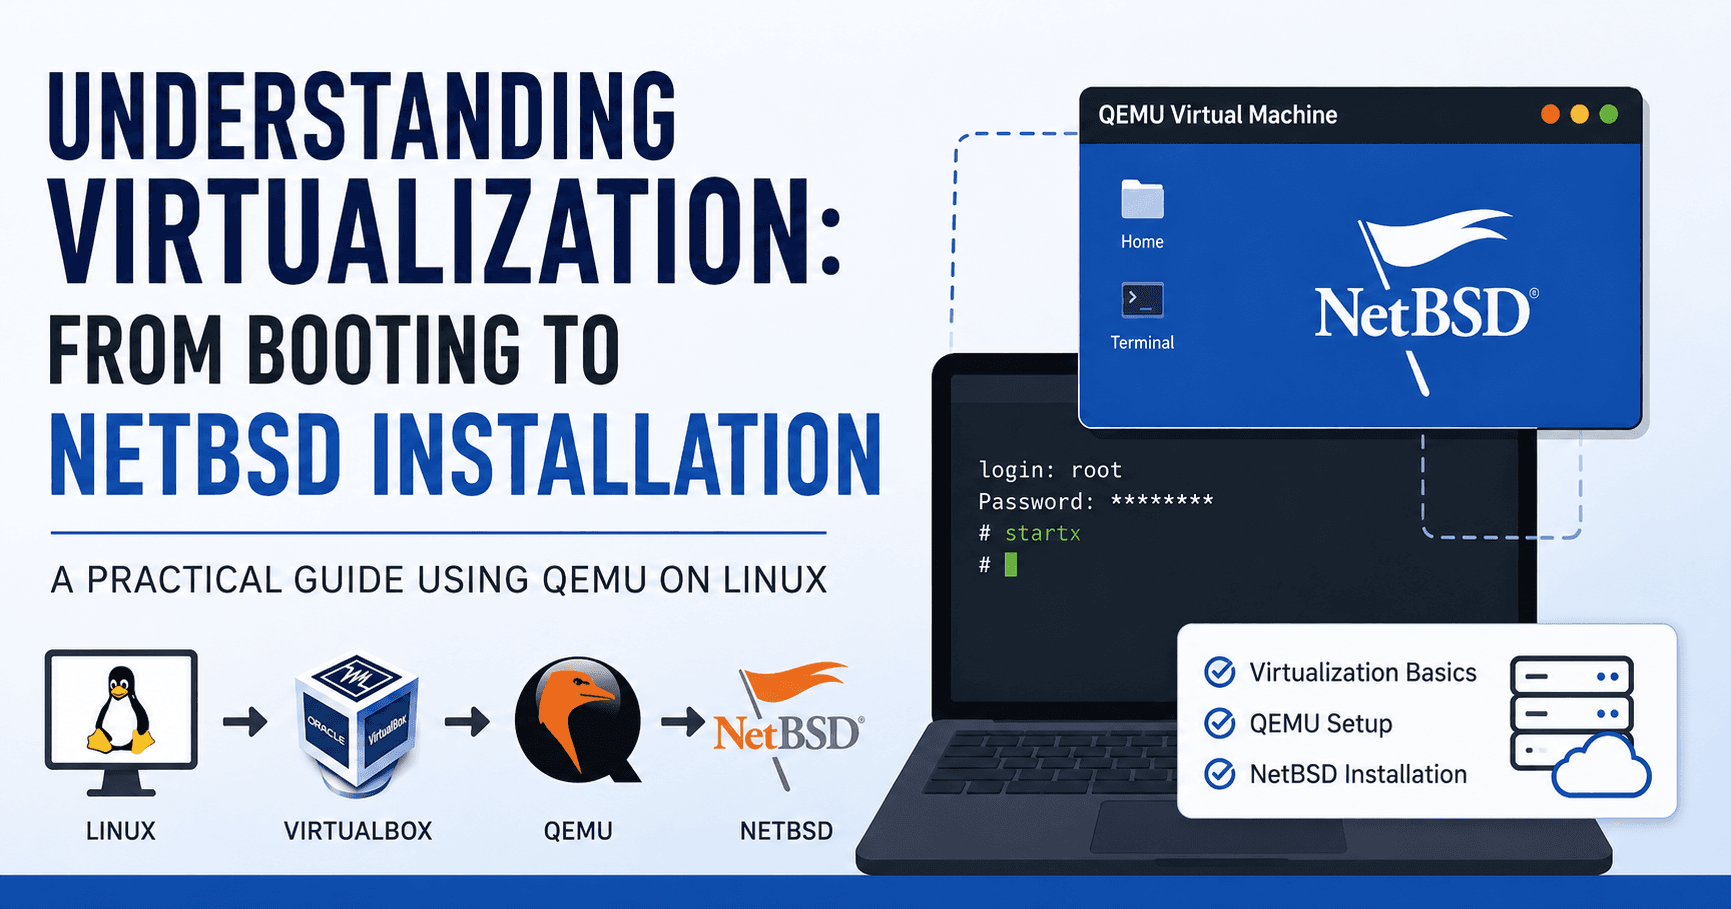
2️⃣ Statement asnd Branch Testing
Statement Testing and Branch Testing; Chapter 2
Chapter 2 focuses on two of the most representative white-box testing techniques: Statement Testing and Branch Testing. Through examples, we will explore how to actually design tests using these methods.
The content of statement testing is somewhat apparent from its name. As for branch testing — what might it involve? Recall the concepts of control flow graphs and coverage covered earlier, and consider what each technique might mean based on its name alone.
문장 테스팅과 분기 테스팅; 두 번째 챕터 시작
두 번째 챕터에서는 화이트박스 테스트의 대표적인 기법인 문장 테스팅과 분기 테스팅, 이 두 가지를 중심으로 살펴본다. 예제를 통해 실제로 테스트를 어떻게 설계하는지를 함께 알아볼 예정이다.
문장 테스팅은 이름에서 어느 정도 그 내용이 드러난다. 분기 테스팅은 과연 무엇을 의미할까? 앞서 배운 제어 흐름도와 커버리지 개념을 떠올리며, 기법의 이름만으로 어떤 내용일지 먼저 생각해보자.
Statement Testing; The Most Fundamental White-Box Test Technique
Statement Testing is also referred to as syntax testing. A program is composed of countless commands — variable declarations, function logic, and so on — and each individual unit separated by a semicolon (;) is called a statement. Statement testing is a method in which input values are selected as test cases so that every statement making up the program is executed at least once. Statement coverage is calculated as follows:
Statement Coverage = Number of Statements Tested / Total Number of Statements × 100%

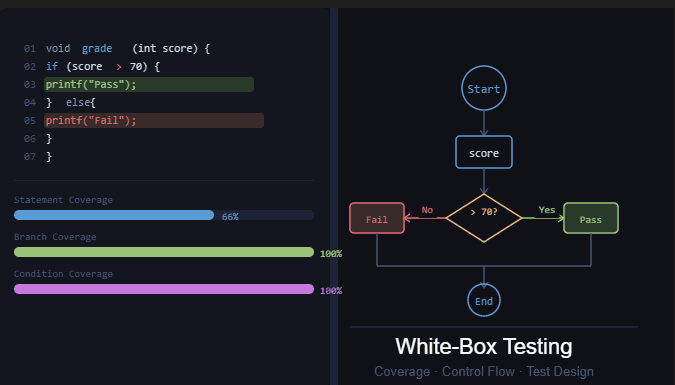
Consider the grade management example. The code contains a total of three statements. When score = 80 is tested, the first statement and printf("Pass") are executed, but printf("Fail") is not. The statement coverage in this case is therefore 2/3, or 66.666%.
To reach 100%, one more test case is needed to cover the third statement. Adding score = 60 causes printf("Fail") to execute as well. With just two test cases — score 60 and score 80 — all three statements are covered, achieving 100% statement coverage.
This is the essence of white-box testing: directly analyzing the source code and understanding its paths, while designing tests that maximize coverage and minimize the number of test cases. Statement testing is the most fundamental approach to this.
문장 테스팅(Statement Testing); 가장 기본적인 화이트박스 테스트 기법
문장 테스팅(Statement Testing)은 구문 테스팅이라고도 불린다. 프로그램은 변수 선언, 함수 로직 구성 등 수많은 명령어로 구성되어 있는데, 이 중 세미콜론(;)으로 구분되는 하나하나의 단위를 **문장(Statement)**이라고 한다. 문장 테스팅이란 이 프로그램을 구성하는 문장들이 최소한 한 번은 실행될 수 있도록 입력값을 테스트케이스로 선정하여 테스트하는 방법이다. 문장 커버리지는 다음과 같이 계산된다.
문장 커버리지 = 테스트한 문장 수 / 전체 문장 수 × 100%
첨부된 성적 관리 기능 예제를 통해 살펴보자. 이 코드에는 총 세 개의 문장이 존재한다. score가 80인 경우를 테스트하면, 첫 번째 문장과 printf("합격")은 실행되지만 printf("불합격")은 실행되지 않는다. 따라서 이 경우의 문장 커버리지는 2/3, 즉 66.666%가 된다.
100%를 달성하려면 세 번째 문장까지 커버할 수 있는 테스트케이스가 하나 더 필요하다. score가 60인 경우를 추가하면 printf("불합격")까지 실행되므로, score 60과 80, 단 두 개의 테스트케이스만으로 세 개의 문장을 모두 커버하여 문장 커버리지 100%를 달성할 수 있다.
이것이 화이트박스 테스트의 핵심이다. 소스코드를 직접 분석하고 경로를 파악하면서, 커버리지는 높이되 테스트케이스의 수는 줄이는 방향으로 테스트를 설계하는 것. 문장 테스팅은 그 중에서도 가장 기본적인 방법이다.

Statement Coverage and the Use of Control Flow Graphs
The key concept that emerges from statement testing is Statement Coverage; a metric representing how thoroughly the statements within a program have been tested. The goal is to design test cases that ensure each statement is executed at least once, while keeping the number of test cases as small as possible.
In the flow graph example, each node represents a single statement. With nodes A through K totaling 10, executing the path A → B → D → H → K covers 5 out of 10 statements, resulting in a statement coverage of 50%. Additional test cases must be designed to cover the remaining nodes and reach 100%.
While test cases can be derived by directly analyzing the source code, using a control flow graph makes it far easier to intuitively understand the flow and derive test cases. This is precisely why control flow graphs are widely used in white-box testing.
문장 커버리지와 제어 흐름 그래프의 활용
문장 테스팅에서 핵심적으로 등장하는 개념이 문장 커버리지(Statement Coverage)다. 프로그램 안에 있는 문장들을 얼마나 테스트했는지의 정도를 나타내는 지표로, 각 문장이 적어도 한 번 이상 실행될 수 있도록 테스트케이스를 설계하되, 그 테스트케이스의 수는 최대한 줄이는 방향으로 설계하는 것이 핵심이다. 첨부된 흐름 그래프를 살펴보자. 각각의 노드를 하나의 문장으로 생각해보면, 전체 노드는 A부터 K까지 총 10개다. 여기서 A → B → D → H → K 경로를 실행하면 10개의 문장 중 5개를 경유한 것이므로 문장 커버리지는 50%가 된다. 100%를 달성하려면 나머지 노드들을 커버할 수 있는 추가적인 테스트케이스를 설계해야 한다. 소스코드를 직접 분석해서 테스트케이스를 만들 수도 있지만, 제어 흐름 그래프를 활용하면 흐름을 직관적으로 파악하여 테스트케이스를 도출하기가 훨씬 수월하다. 이것이 바로 화이트박스 테스트에서 제어 흐름 그래프가 널리 활용되는 이유이다.
Statement Testing in Practice; Achieving 100% Statement Coverage
Let's apply statement testing to a concrete program and work through the process of deriving test cases that achieve 100% statement coverage by representing the source code as a control flow graph.

The program takes X, Y, and Z as inputs and consists of two if statements. The first if statement stores Z divided by X back into Z if X is greater than 1 AND Y equals 1. The second if statement adds 1 to Z if X equals 2 OR Z is greater than 1. Represented as a control flow graph, this produces two branch nodes, each with a yes path executing the statements Z = Z / X and Z = Z + 1 respectively. The goal is to create the minimum number of test cases that execute both of these statements.

With X=3, Y=0, Z=1 as the first test case, the AND condition in the first if statement fails because Y is not 1, so the flow takes the no path. The second if statement also takes the no path. As a result, neither statement is executed, yielding a statement coverage of 0%. Despite the effort put into creating this test case, it fails to execute even a single target statement — a poorly designed case.
In contrast, with X=2, Y=1, Z=6, the first AND condition is satisfied (X > 1 and Y = 1), so the yes path is taken and Z = Z / X executes. The second condition is also satisfied (X = 2), so Z = Z + 1 executes as well. A single test case covers both statements, achieving 100% statement coverage.
Well-designed test cases can achieve high coverage with fewer cases, while poorly designed ones can yield wasted effort and meaningless results. Test case design requires experience and know-how, and it is important to consistently practice considering both test suitability and coverage together.
문장 테스팅 실전 예제; 문장 커버리지 100% 달성하기
이번에는 실제 코드에 문장 테스팅을 적용하여 문장 커버리지 100%를 만족하는 테스트케이스를 직접 만들어보는 과정을 살펴본다. 소스코드를 제어 흐름도로 표현하고, 이를 바탕으로 테스트케이스를 도출하는 흐름을 따라가 보자.
먼저 코드를 살펴보면, 입력값으로 X, Y, Z를 받으며 두 개의 if문으로 구성되어 있다. 첫 번째 if문은 X가 1보다 크고 AND Y가 1이면 Z를 X로 나눠 Z에 저장하는 조건이고, 두 번째 if문은 X가 2이거나 OR Z가 1보다 크면 Z에 1을 더해 다시 Z에 저장하는 조건이다. 이를 제어 흐름도로 표현하면 두 개의 분기문과 각각의 yes 경로에 실행되는 문장 Z = Z / X, Z = Z + 1이 이어지는 형태가 된다. 여기서 테스트의 목표는 이 두 개의 문장을 모두 실행시키는 최소한의 테스트케이스를 만드는 것이다.
첫 번째 케이스로 X=3, Y=0, Z=1을 넣어보자. 첫 번째 if문의 AND 조건에서 Y가 1이 아니므로 no로 빠지고, 두 번째 if문도 마찬가지로 no로 빠진다. 결과적으로 두 문장 중 단 하나도 실행되지 않아 문장 커버리지는 0%가 된다. 열심히 테스트케이스를 만들었지만 정작 테스트하고자 했던 문장을 하나도 실행하지 못한, 잘못 설계된 케이스다.
반면 X=2, Y=1, Z=6을 넣으면 어떨까? 첫 번째 AND 조건에서 X가 1보다 크고 Y가 1이므로 yes로 빠져 Z = Z / X가 실행된다. 이후 두 번째 조건에서도 X가 2이므로 yes로 빠져 Z = Z + 1까지 실행된다.
결과적으로 단 하나의 테스트케이스만으로 두 개의 문장을 모두 커버하여 문장 커버리지 100%를 달성하게 된다. 이처럼 테스트케이스를 잘 설계하면 적은 수의 케이스로도 높은 커버리지를 달성할 수 있다. 반대로 잘못 설계하면 많은 노력을 기울이고도 엉뚱한 결과가 나올 수 있다. 테스트케이스 설계에는 충분한 경험과 노하우가 필요하며, 테스트 적합성과 커버리지를 함께 고려하는 연습을 꾸준히 해나가는 것이 중요하다.
Statement Testing in Practice 2; VIP Membership Discount Rate Management Program
The second example applies statement testing to a program that manages discount rates based on VIP membership level. The goal is to create test cases that achieve 100% statement coverage for the calDiscountRate() method.

The program takes two inputs: String membership and int payMonths. The discount rate is divided into three conditions: 16% for VIP members who have paid for 6 or more months, 20% for 12 or more months, and 25% for 18 or more months. Including the final return discountRate, the program contains a total of 5 statements. The goal is to cover all five with the minimum number of test cases.
The first test case covers only 3 statements: the first condition (16%), the entry point of the second condition, and return discountRate. That is 3 out of 5, giving a coverage of 60%. To reach 100%, test cases covering the 20% and 25% conditions must be added. This leads to the conclusion that at least 3 test cases are required for this example.
If one case is accidentally missed and only two test cases are executed, the statement corresponding to the 25% discount rate would go untested, leaving statement coverage at 80%. This illustrates how important it is to carefully analyze the source code, represent it as a control flow graph, and design test cases that efficiently cover every statement.
문장 테스팅 실전 예제 2;VIP 멤버십 할인율 관리 프로그램
두 번째 예제는 VIP 멤버십 등급에 따른 할인율을 관리하는 프로그램에 문장 테스팅을 적용한 사례다. calDiscountRate() 메서드를 대상으로 문장 커버리지 100%를 만족하는 테스트케이스를 만들어본다. 이 프로그램은 String membership과 int payMonths, 두 개의 입력을 받는다. 할인율은 세 가지 조건으로 나뉜다. membership이 VIP이면서 6개월 이상 납부한 경우 16%, 12개월 이상인 경우 20%, 18개월 이상인 경우 25%가 적용된다. 마지막 return discountRate까지 포함하여 전체 문장은 총 5개다. 이 다섯 개의 문장을 최소한의 테스트케이스로 커버하는 것이 목표다. 첫 번째 테스트케이스를 실행하면 첫 번째 조건(16%), 두 번째 조건 진입부, 그리고 return discountRate, 이렇게 3개의 문장만 커버된다. 5개 중 3개이므로 커버리지는 60%다. 100%를 달성하려면 20% 조건과 25% 조건을 각각 커버하는 테스트케이스가 반드시 추가되어야 한다. 따라서 이 예제는 적어도 3개의 테스트케이스가 필요하다는 결론이 나온다. 만약 실수로 한 케이스를 빠뜨려 두 개의 테스트케이스만 실행되었다면, 25% 할인율에 해당하는 문장이 실행되지 않아 문장 커버리지는 80%에 그치게 된다. 이처럼 소스코드를 꼼꼼히 분석하고 제어 흐름도로 표현하여, 모든 문장을 효율적으로 커버하는 테스트케이스를 설계하는 것이 얼마나 중요한지를 잘 기억해두자.
Branch Testing; Verifying the True/False of the Overall Condition Expression
The second white-box testing technique is Branch Testing. It involves selecting test cases so that each branch in the program; such as an if statement — is executed once when true and once when false. Since a branch produces two directions (true/false, or yes/no), verifying both is the core objective. Because it involves making a decision (yes or no), it is also referred to as Decision Testing.
An important distinction: branch testing targets the overall condition expression, not individual conditions. Test cases only need to satisfy the two cases where the overall condition expression is true and where it is false.

In the scholarship selection example, the condition is if ((average >= 90) && (subject count >= 5)). Inputting (95, 6) satisfies both conditions, taking the true path and selecting the student as a scholarship recipient. Inputting (72, 3) fails the average condition, taking the false path and ending without selection. These two test cases alone achieve 100% branch coverage. If only the yes case is tested, branch coverage would be just 50%.
Just as with statement testing, it is important to carefully analyze branch structures and design test cases that satisfy both yes and no outcomes while minimizing the total number of cases.
분기 테스팅(Branch Testing);전체 조건식의 true/false를 검증하라
화이트박스 테스트의 두 번째 방법은 분기 테스팅(Branch Testing)이다. 프로그램 안에 존재하는 if문과 같은 분기문이 true인 경우와 false인 경우를 모두 한 번씩 실행할 수 있도록 테스트케이스를 선정하여 테스트하는 방법이다. 분기문은 true/false, 즉 yes/no로 나뉘어 총 2개의 분기가 생기는데, 이 두 가지를 모두 검증하는 것이 핵심이다. yes/no와 같이 무언가를 결정하는 역할을 한다는 점에서 결정 테스팅(Decision Testing)이라고도 불린다. 여기서 중요한 점은 분기 테스팅이 개별 조건이 아닌 전체 조건식을 대상으로 한다는 것이다. 전체 조건식이 true인 경우와 false인 경우, 이 두 가지를 만족하는 테스트케이스를 만들면 된다. 장학생 선정 기능 예제를 살펴보자. 평균 점수가 90점 이상이고 수강 과목 수가 5개 이상인 경우 장학생으로 선정하는 조건이다. 즉 if ((평균 >= 90) && (과목수 >= 5))라는 하나의 전체 조건식이 존재한다. 여기에 (95, 6)을 입력하면 두 조건을 모두 만족하므로 true로 빠져 장학생이 선정되고, (72, 3)을 입력하면 평균이 90 미만이므로 false로 빠져 종료된다. 이 두 가지 테스트케이스만으로 분기 커버리지 100%를 달성할 수 있다. 만약 yes 경우만 테스트된다면 분기 커버리지는 50%에 그치게 된다. 분기 테스팅에서도 마찬가지로, 분기문을 잘 분석하여 yes/no를 모두 만족하면서 테스트케이스의 수는 최소화하는 설계가 중요하다는 점을 기억하자.
Branch Coverage; Verifying Every Branch
The metric applied when performing branch testing is Branch Coverage, also known as Decision Coverage. The key is to design test cases that ensure every branch in the program is executed at least once in both its true and false directions.

In the flow graph, there are 10 total nodes (A through K). Identifying the branches: the first branch splits from A into B and C; the second splits from B into D and E; the third splits from C into F and G. With two directions per branch, the total number of branches is 6. Achieving 100% branch coverage requires test cases that cover all 6.
Testing the path A → B → D → H → K covers only the first and second branches. With just 2 out of 6 branches visited, branch coverage is approximately 33%. Just as with statement coverage, it is important to use the control flow graph to grasp the branch structure at a glance and design test cases that cover as many branches as possible with the fewest cases.
분기 커버리지(Branch Coverage); 모든 분기를 검증하라
분기 테스팅을 수행할 때 적용되는 지표가 바로 분기 커버리지(Branch Coverage)다. 결정 커버리지(Decision Coverage)라고도 불리며, 프로그램 내 존재하는 모든 분기가 true인 경우와 false인 경우를 적어도 한 번씩 실행할 수 있도록 테스트케이스를 설계하는 것이 핵심이다. 첨부된 흐름도를 살펴보자.
전체 노드는 A부터 K까지 총 10개다. 여기서 분기가 몇 개 존재하는지 파악해보면, A에서 B와 C로 나뉘는 첫 번째 분기, B에서 D와 E로 나뉘는 두 번째 분기, C에서 F와 G로 나뉘는 세 번째 분기가 존재한다. 각 분기마다 yes/no 두 방향이 생기므로 전체 분기 수는 6개가 된다. 분기 커버리지 100%를 달성하려면 이 6개의 분기를 모두 커버하는 테스트케이스를 만들어야 한다. A → B → D → H → K 경로를 테스트했다고 가정하면, 이 경로에서는 첫 번째 분기와 두 번째 분기만 커버된다. 결과적으로 6개의 분기 중 2개만 방문한 것이므로 분기 커버리지는 약 33%에 그치게 된다. 이것이 분기 커버리지의 개념이다. 문장 커버리지와 마찬가지로, 흐름도를 통해 분기 구조를 한눈에 파악하고 최소한의 테스트케이스로 최대한 많은 분기를 커버하는 설계가 중요하다.
Branch Testing in Practice; Achieving 100% Branch Coverage
Applying branch testing to the same program used in the statement testing examples, the goal is to create test cases that achieve 100% branch coverage. Since the program and its control flow graph have already been explained, the focus here is on the branches.

The program has 2 branch nodes. With two directions per node, the total number of branches is 4. The goal is to derive the minimum test cases that cover all 4 branches.
With X=3, Y=0, Z=1, the AND condition in branch 1 is not satisfied, flowing to false (no), and branch 2 also takes the false (no) path. With X=2, Y=1, Z=6, both branch 1 and branch 2 take the true (yes) path. Two test cases cover all 4 branches, achieving a branch coverage of 4/4 = 100%.
One key observation: these two test cases are identical to those used in statement testing. In other words, the same test cases simultaneously satisfy both statement coverage and branch coverage. Well-designed test cases can fulfill multiple coverage criteria at once. Achieving multiple coverages with the minimum number of test cases — this is the essence of test design strategy.
This chapter covered two of the most representative white-box testing techniques: statement testing and branch testing.
분기 테스팅 실전 예제; 분기 커버리지 100% 달성하기
앞서 문장 테스팅에서 다뤘던 동일한 프로그램에 이번에는 분기 테스팅을 적용하여 분기 커버리지 100%를 만족하는 테스트케이스를 만들어보자. 프로그램과 제어 흐름도에 대한 설명은 문장 테스팅에서 이미 다루었으므로, 여기서는 분기에 집중한다.
이 프로그램에는 분기 노드가 총 2개 존재한다. 각 분기 노드마다 yes/no 두 방향이 생기므로 전체 분기 수는 4개다. 따라서 이 4개의 분기를 모두 커버하는 최소한의 테스트케이스를 도출하는 것이 목표다.

첫 번째 테스트케이스로 X=3, Y=0, Z=1을 입력하면, 분기1에서 AND 조건을 만족하지 못해 false(no)로 흘러가고, 분기2도 마찬가지로 false(no)로 빠진다. 두 번째 테스트케이스로 X=2, Y=1, Z=6을 입력하면, 분기1과 분기2 모두 true(yes)로 흘러간다. 결과적으로 두 개의 테스트케이스만으로 4개의 분기를 모두 커버하여 분기 커버리지 4/4 = 100%를 달성하게 된다.
여기서 주목할 점이 있다. 이 두 테스트케이스는 앞서 문장 테스팅에서 사용했던 입력값과 동일하다. 즉, 같은 테스트케이스로 문장 커버리지와 분기 커버리지를 동시에 만족시킨 것이다. 이처럼 잘 설계된 테스트케이스는 여러 커버리지를 한꺼번에 충족시킬 수 있다. 최소한의 테스트케이스로 다양한 커버리지를 동시에 만족하는 것, 이것이 테스트 설계 전략의 핵심임을 꼭 기억해두자.
이번 챕터에서는 화이트박스 테스트의 대표적인 두 가지 기법인 문장 테스팅과 분기 테스팅에 대해 살펴보았다.
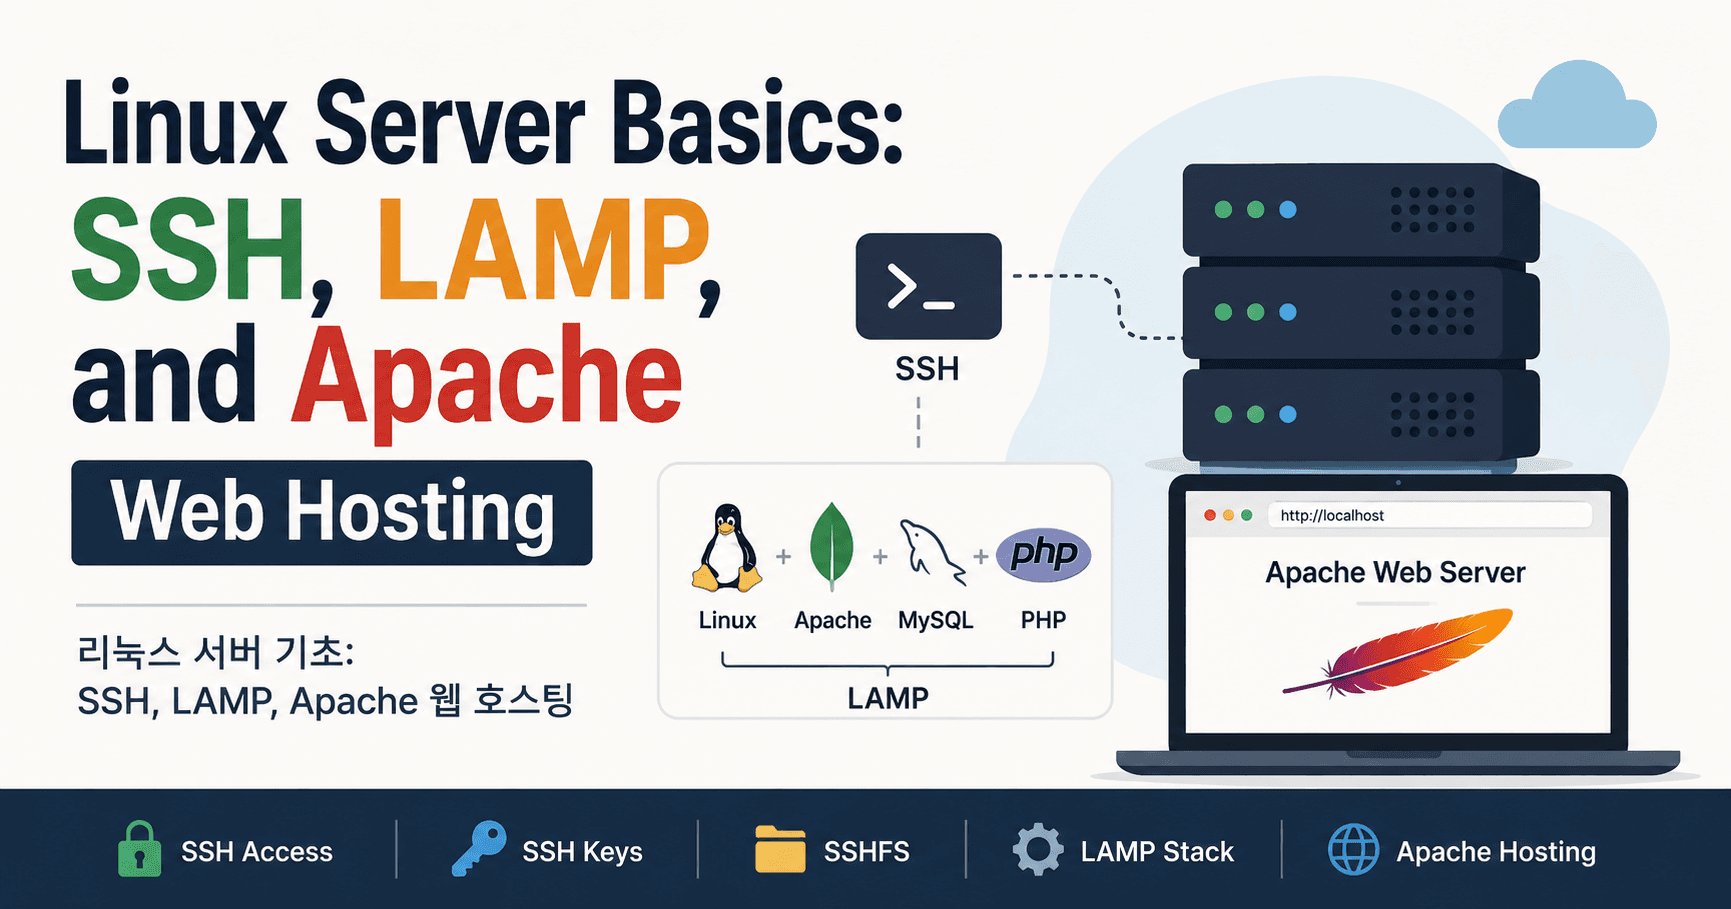
3️⃣ Conditon Testing
이번 챕터에서는 조건테스팅에 대해서 살펴본다. 조건테스팅은 무엇이고 이를 살펴보는 예시에 대해서 살펴본다. 먼저 잠깐 생각해보면 - 조건테스팅은 무엇인지 이름만으로 잠시 생각해보자.

조건 테스팅(Condition Testing); 개별 조건을 검증하라
세 번째 기법은 조건 테스팅(Condition Testing)이다. 앞서 배운 분기 테스팅과의 차이점을 명확히 이해하는 것이 중요하다. 분기 테스팅은 분기문의 전체 조건식이 true인 경우와 false인 경우를 대상으로 테스트하는 방법이었다. 반면 조건 테스팅은 전체 조건식의 결과와 관계없이 각 개별 조건이 true 한 번, false 한 번을 갖도록 테스트케이스를 선정하여 테스트하는 방법이다. 조건 커버리지는 다음과 같이 계산된다.
조건 커버리지 = 테스트한 개별 조건의 T/F 수 / 전체 개별 조건의 T/F 수 × 100%
장학생 선정 기능 예제를 통해 살펴보자. if ((평균 >= 90) && (과목수 >= 5))라는 분기문에서 전체 조건식은 (평균 >= 90) && (과목수 >= 5) 전체이고, 개별 조건은 평균 >= 90과 과목수 >= 5, 이 두 가지다. 분기 테스팅은 이 전체 조건식의 true/false를 기준으로 삼지만, 조건 테스팅은 각각의 개별 조건이 모두 true와 false를 한 번씩 경험하도록 테스트케이스를 설계한다. (95, 6)과 (72, 3)을 테스트하면, 첫 번째 케이스에서 두 개별 조건이 모두 true, 두 번째 케이스에서 모두 false가 되어 총 4가지 경우를 모두 만족하게 된다. 결과적으로 조건 커버리지 100%를 달성하게 된다. 개별 조건 각각을 검증하는 만큼, 분기 테스팅에 비해 테스트케이스의 수가 일반적으로 많아질 수밖에 없다는 점도 함께 기억해두자.
분기와 조건의 차이 — 헷갈리지 않게 정리하기

분기 테스팅과 조건 테스팅의 차이를 명확히 이해하기 위해 구체적인 예시로 다시 한번 정리해보자.
"VIP이고 6개월 이상 자동 결제를 하면 16%의 요금을 할인 받는다"는 조건이 있다고 할 때, 여기서 분기는 이 전체 조건식, 즉 할인을 받느냐 받지 않느냐를 결정하는 것으로 1개다. 반면 개별 조건은 'VIP인가'와 '6개월 이상 자동 결제를 했는가', 이렇게 2개가 된다.
분기 테스팅은 이 전체 조건식이 true인 경우와 false인 경우를 대상으로 테스트하고, 조건 테스팅은 각각의 개별 조건인 VIP 여부와 납부 개월 수가 각각 true와 false인 경우를 대상으로 테스트한다는 점이 두 기법의 핵심적인 차이다.

조건 테스팅 실전 예제; 조건 커버리지 100% 달성하기 (1/2)
앞서 문장 테스팅과 분기 테스팅에서 다뤘던 동일한 프로그램에 이번에는 조건 테스팅을 적용하여 조건 커버리지 100%를 만족하는 테스트케이스를 작성해보자.
먼저 이 프로그램의 구조를 조건 테스팅의 관점에서 분석해보자. 분기는 총 2개이고, 각 분기 안의 개별 조건을 살펴보면 다음과 같다. 첫 번째 분기 IF ((X > 1) AND (Y == 1))에서 'X가 1보다 큰가'가 개별 조건1, 'Y가 1인가'가 개별 조건2가 된다. 두 번째 분기 IF ((X == 2) OR (Z > 1))에서 'X가 2인가'가 개별 조건3, 'Z가 1보다 큰가'가 개별 조건4가 된다. 결과적으로 개별 조건은 총 4개다.
조건 테스팅에서는 이 4개의 개별 조건 각각에 대해 true와 false를 한 번씩 검증해야 한다. 따라서 총 8가지 경우를 만족해야 조건 커버리지 100%를 달성할 수 있다. 이 8가지 경우를 최소한의 테스트케이스로 커버하는 설계가 필요하다.

조건 테스팅 실전 예제; 조건 커버리지 100% 달성하기 (2/2)
이번에는 실제로 테스트케이스를 어떻게 도출했는지 살펴보자. 목표는 4개의 개별 조건 각각에 대해 true와 false를 모두 만족하는, 즉 총 8개의 경우를 커버하는 최소한의 테스트케이스를 만드는 것이다. 이것이 바로 테스트 적합성이다.
첫 번째 테스트케이스로 X=0, Y=0, Z=1을 입력해보자. 조건1에서 X가 1보다 커야 하는데 0이므로 false, 조건2에서 Y가 1이어야 하는데 0이므로 false, 조건3에서 X가 2여야 하는데 0이므로 false, 조건4에서 Z가 1보다 커야 하는데 Z=1이므로 false가 된다. 하나의 테스트케이스로 4개의 개별 조건을 모두 false로 커버하는 아주 좋은 케이스다.
두 번째 테스트케이스로 X=2, Y=1, Z=6을 입력하면, 조건1에서 X가 1보다 크므로 true, 조건2에서 Y가 1이므로 true, 조건3에서 X가 2이므로 true, 조건4에서 Z가 1보다 크므로 true가 된다. 마찬가지로 하나의 케이스로 4개의 개별 조건을 모두 true로 커버한다.
결과적으로 단 2개의 테스트케이스만으로 8개의 개별 조건을 모두 만족하여 조건 커버리지 8/8 = 100%를 달성하게 된다.
시간과 비용, 자원이 충분하다면 여러 테스트케이스를 만들어 다양하게 테스트할 수 있겠지만, 실제 프로젝트에서는 항상 제약이 존재한다. 주어진 자원을 효율적으로 활용하는 것이 프로젝트의 목표이며, 이를 위해 테스트 전략을 잘 수립하고 적합성 높은 테스트케이스를 설계하는 능력이 필요하다. 이러한 전문성은 다양한 케이스를 직접 만들어보는 연습을 통해 쌓을 수 있으며, 테스트 설계와 관리 관련 자격증을 취득하는 것도 도움이 될 수 있다.
지금까지 화이트박스 테스트의 주요 기법인 함수 커버리지, 문장 테스팅, 분기 테스팅, 조건 테스팅까지 커버리지를 높이기 위한 각각의 테스팅 기법에 대해 살펴보았다.